Journal Entry Template
The Journal Entry Template lets you post Journal Entries from Excel directly into NetSuite as transactions. It also supports downloading and updating of existing entries.
Note
Review the Journal Entry Fields preferences to adjust which custom fields and custom segments are accessible in your journal entry template.
Journal Entry Template Fields
Journal Entry Number
The Journal Entry # field will be used to indicate which options are activated in the Finsyte Ribbon. How it works when viewing an existing journal entry.
- To create a new Journal Entry, leave the Journal Entry # blank and fill in the required inputs. The number will populate once the entry gets created.
- To Download an existing Journal Entry, enter in the exact Journal Entry Number (ex: JE188). This field is case sensitive.
Parameters
| Parameter | Information |
|---|---|
| Subsidiary | Required - Select an option from the dropdown. Consolidated Subsidiares are not available for Journal Entry Uploads. |
| Date | Required - Defaults to today's date. This will be the date the transaction is marked as posted. |
| Book | Defaults to 1. |
| Currency | Will utilize the currency under the Subsidiary selected unless an alternative currency is selected from the dropdown list. |
| Exchange Rate | If a point-in-time exchange rate should be specified for this transaction, that will go here. |
| Memo | This is a free text field for titling the Journal Entry. |
| Out of Balance By | Not an input field. If this number is not exactly 0, the Journal Entry will not successfully update to NetSuite. |
| Posting Period | If the journal entry should be marked as posted in a different period than the one that the Date will fall into, select that Period here. |
| Reversal Date | If the journal entry is set to reverse on a specific date, specify that here. |
Remarks
- The Approved checkbox, when checked, indicates that the template will create a Posted journal entry when the user selected "Create Journal Entry". If a company requires approval for all Journal Entries, a user may not be able to create a posted journal entry and will need to uncheck Approved to upload.
- Next Approver is a read-only field that will be filled in if that option has been determined by a company's NetSuite setup for journal entries.
- The parameters seen in the template are based around what parameters are available inside of NetSuite Journal Entry screens to ensure needed information can be provided before uploads are complete.
- Credit and Debit balances need to total to zero for a Journal Entry to update to NetSuite and post.
Transaction Lines
| Field | Information |
|---|---|
| Account Number | Type in an account number from the GL Account list. |
| Account Name | Typing in the Account Number will automatically return the Account Name using the GLAccountName function. |
| Debit | Amount Balance. Currency will depend on Subsidiary or optional currency parameter. |
| Credit | Amount Balance. Currency will depend on Subsidiary or optional currency parameter. |
| Memo | Optional note about the transaction line being entered. |
| Name | Optional entity name - the exact name syntax is required for proper placement of the journal entry. |
| Department | Optional segment details. Select the Department Dropdown to more easily select a Department. |
| Class | Optional segment details. Select the Class Dropdown to more easily select a Class. |
| Location | Optional segment details. Select the Location Dropdown to more easily select a Location. |
| Custom Segments (If Applicable) | Any custom segments that are included in a Finsyte instance will show up at the end of the Journal Entry template. Easily review options for each custom segment by pulling in their respective dropdowns. 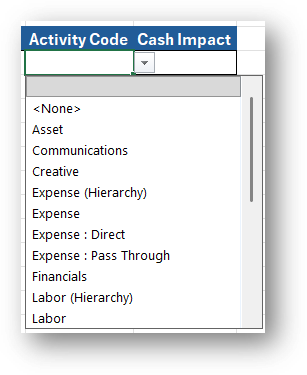 |
Examples
New Journal Entry
Let's say a user wants to create a Journal Entry for my Headquarters Subsidiary to debit inventory and credit accounts payable - trade once every month.
- Fill in parameters:
- Subsidiary should be Headquarters.
- Memo will be "Purchased Inventory - Standard Monthly Shipment"

- Type in Account Number 1200 for the first part of the Journal Entry. The Account name will auto-fill as Inventory and we will be debiting $5,000. Add a memo of "Purchased Inventory".
- Type in Account Number 2010 for the second part of the Journal Entry. The Account name will auto-fill as Accounts Payable - Trade and we will be crediting the same amount. Add a memo of "Payment for Inventory".
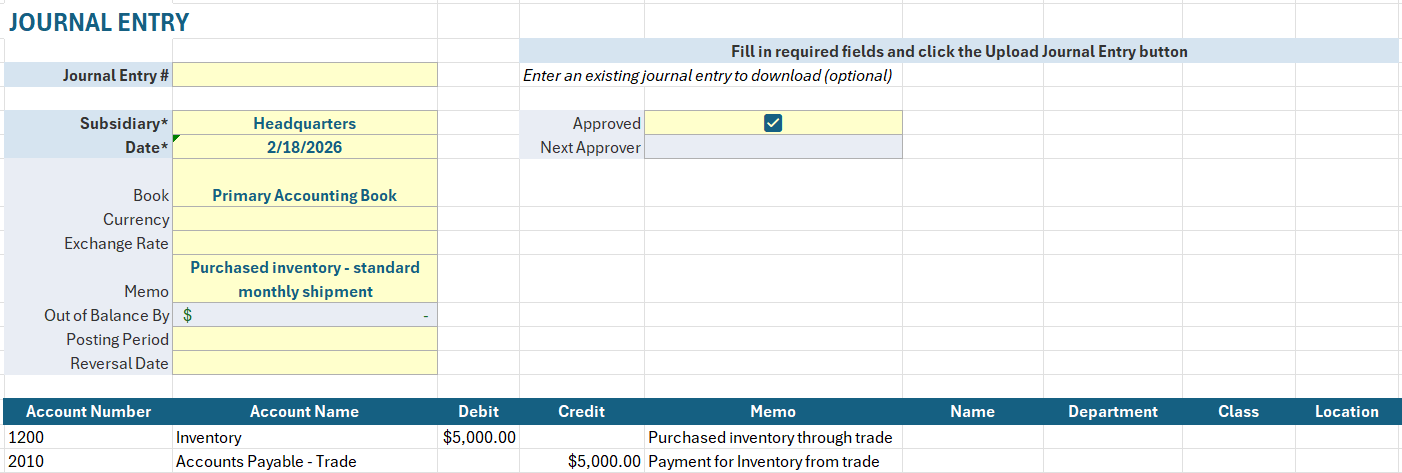
- Notice - Out of Balance By is showing zero amount.
- Select Create New Entry.
- Select the link for Review Journal Entry in NetSuite to see the posted Journal Entry that was just created.
- To re-use this template every month, save the Excel Workbook and return to it in 1 month. Update the Date field and select Update Journal Entry again to create another posted transaction with the same inventory debit and accounts payable - trade credit.


Review and Update Existing Journal Entry
Let's say a user wants to review an existing Journal Entry and update the Debit and Credit amounts to be accurate.
- Fill in the Journal Entry # as JE276 and select Enter.
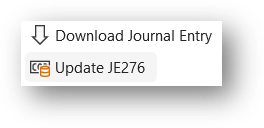
- Select Download Journal Entry.
- Update the Debit and Credit amounts.
- Select Update JE276.
- There will be a link to review the Journal Entry as needed in cell E6.

Utilize Existing Journal Entry to Create New
Let's say a user wants to use a Journal Entry from last month to create a new, similar journal entry for this month.
- Fill in the Journal Entry # as JE276.
- Select Download Journal Entry.
- Adjust the Date input to account for a new journal entry and remove the Journal Entry # input in cell C4.
- Select Create New Entry once all information looks correct for a new Journal Entry.